Home > tyGraph Support Articles > Updating a Report from the Latest PBIX Files
この記事をダウンロードUpdating a Report from the Latest PBIX Files
Step 1: Download the Latest PBIX Files
Download the latest PBIX file for the report you want to update.
Step 2: Back Up Existing Reports
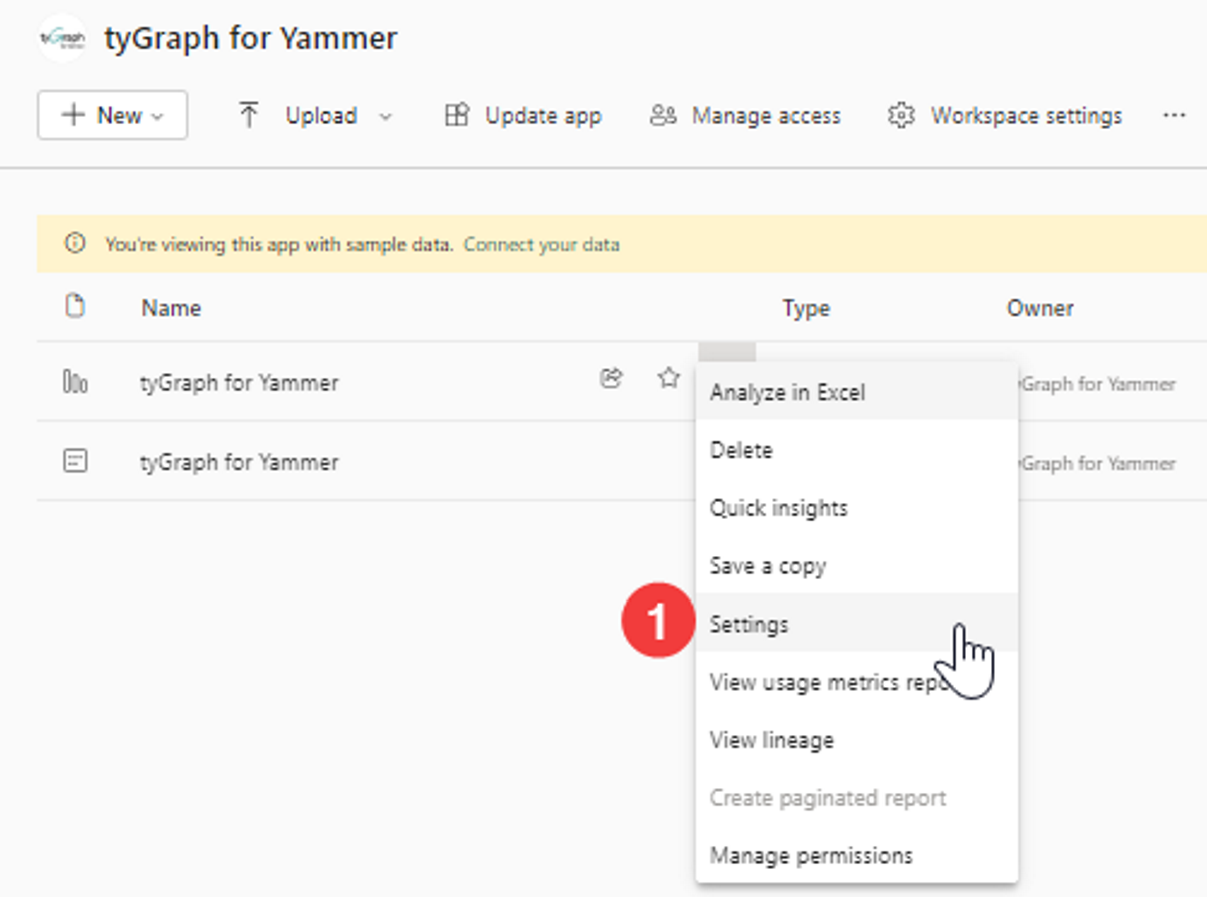
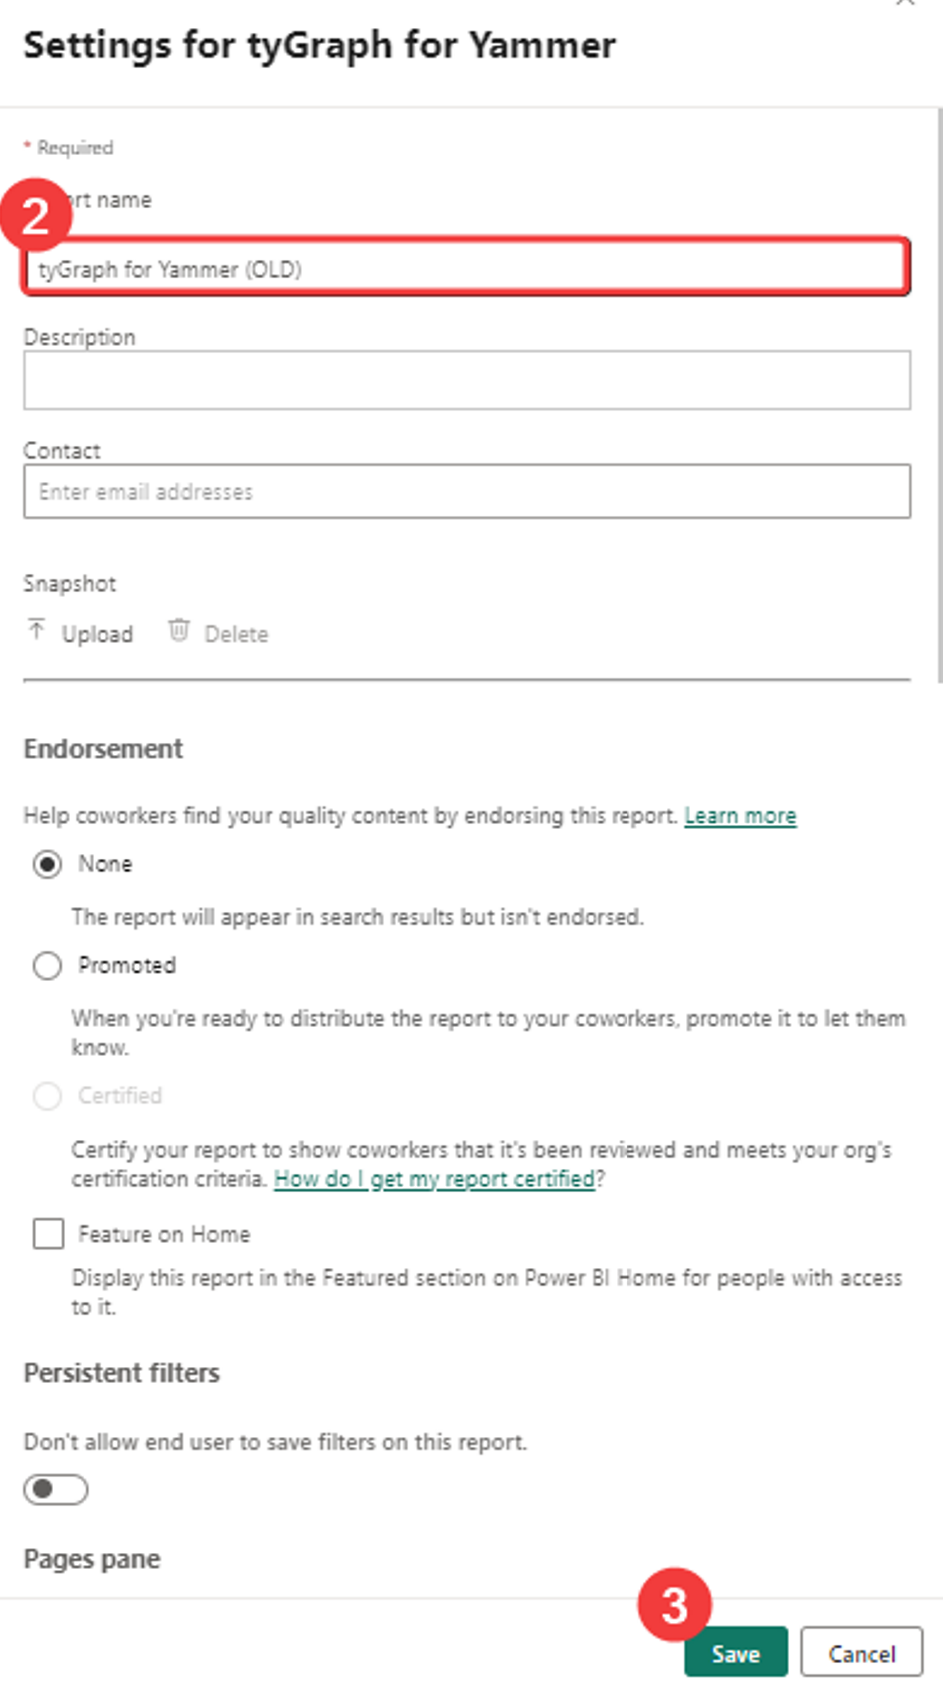
We recommend running the old and new versions side by side until you confirm the update is working as expected. Rename older reports and semantic models by adding a suffix such as - OLD. This helps prevent anything with the default name, such as tyGraph for Yammer, from being overwritten.
Step 3: Load the New Model
-
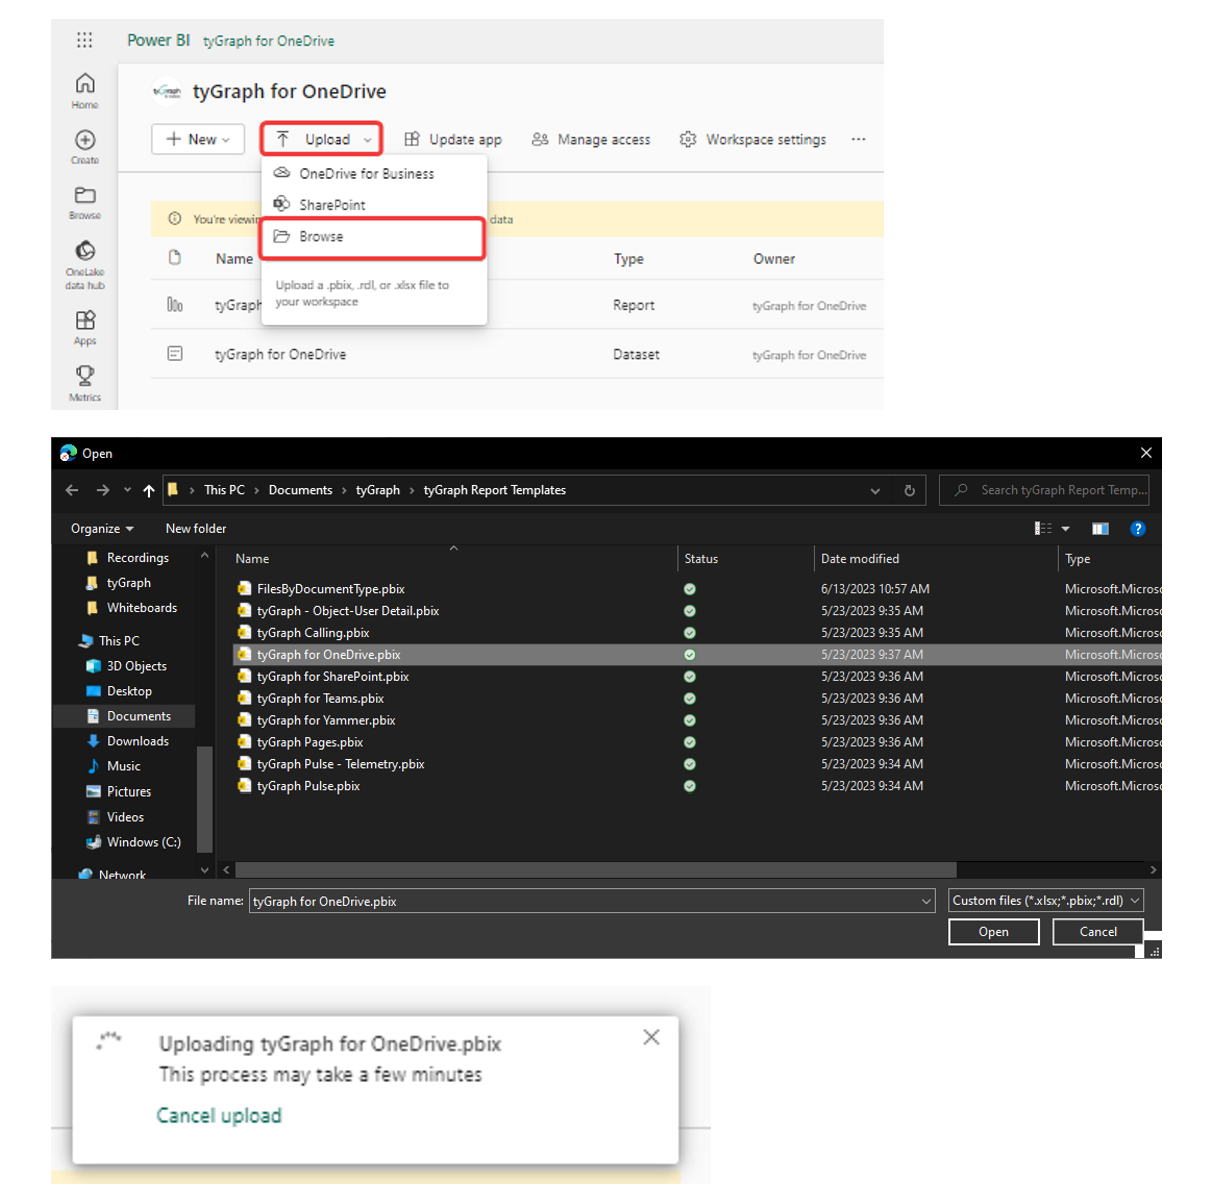
Create a new workspace or open the existing workspace for the report.
-
Select Upload > Browse, then choose the PBIX file you downloaded in Step 1.
Step 4: Authenticate the New Dataset
-
Click the ellipsis (
...) next to the new dataset. -
Select Schedule refresh.
-
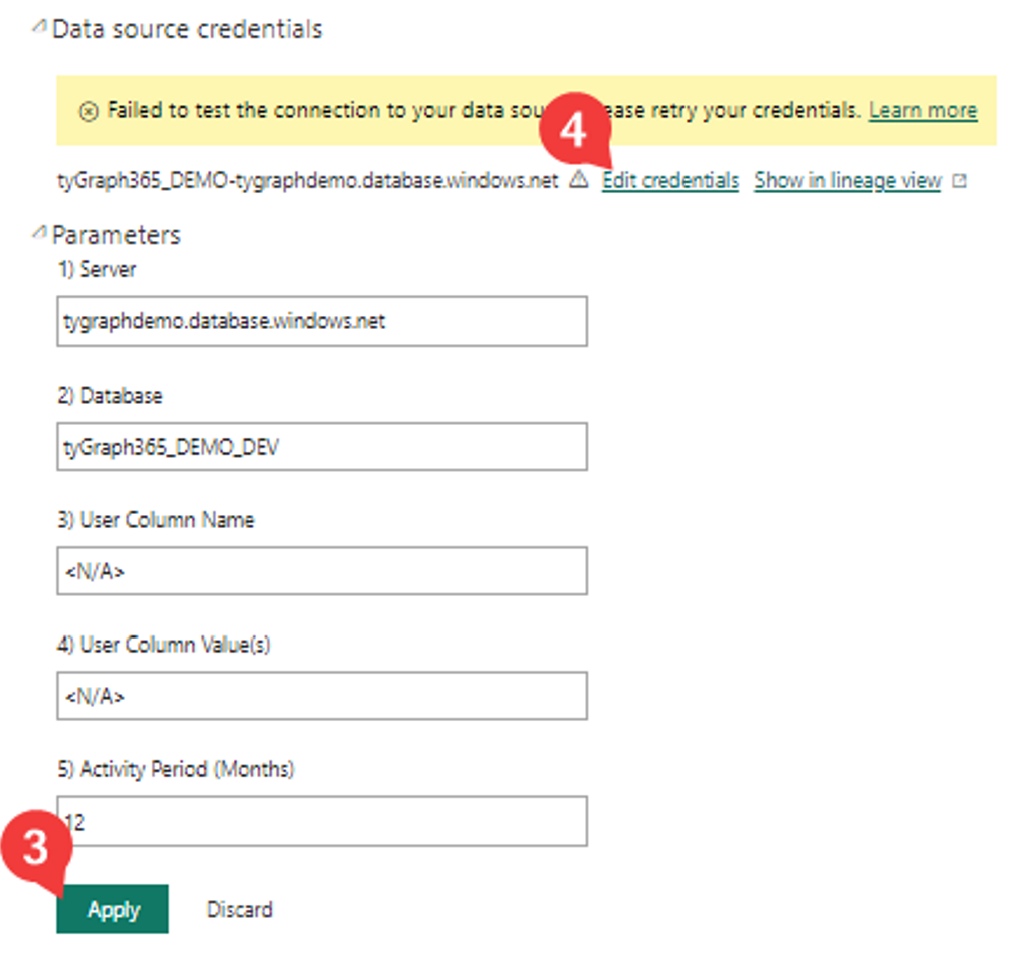
Open the Parameters section, enter your data source information, and click Apply.
-
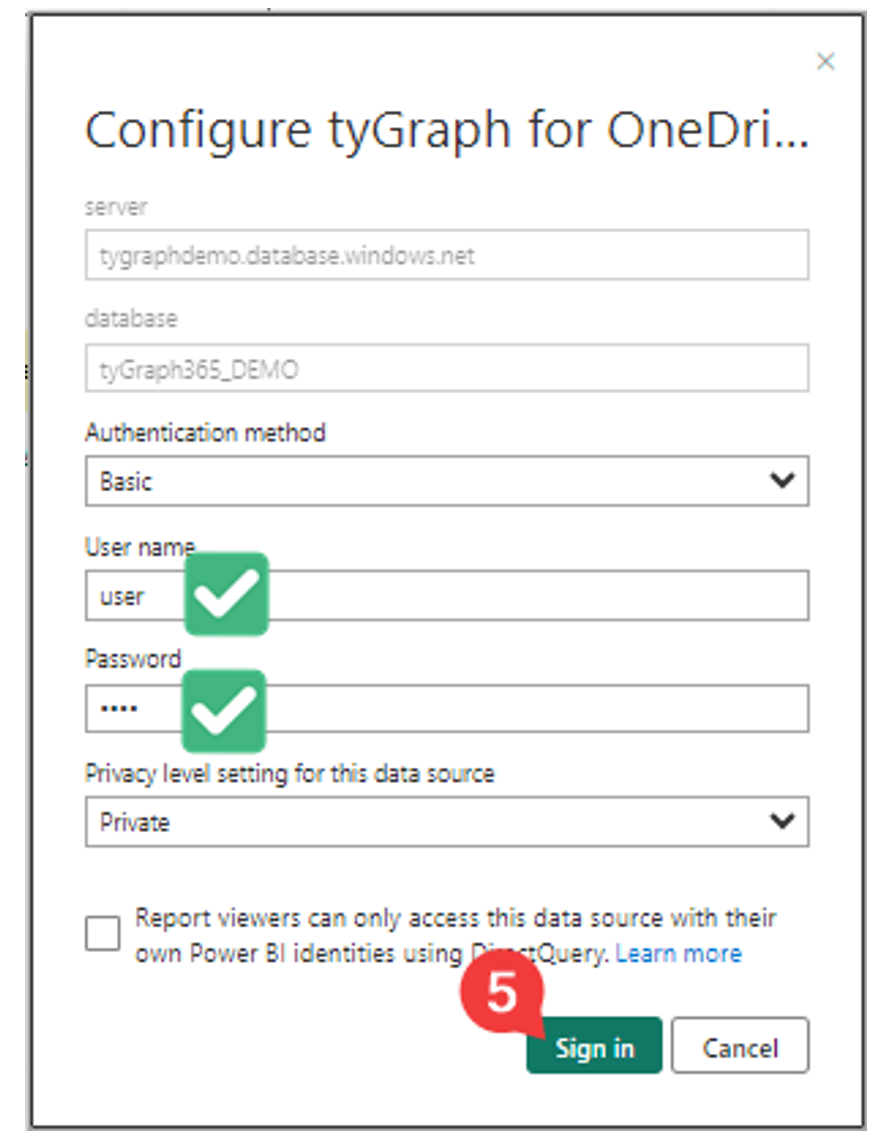
Select Edit credentials and enter the required data source credentials. If you do not have these details, contact your tyGraph administrator or support team.
-
Enter your credentials and click Sign in.
-
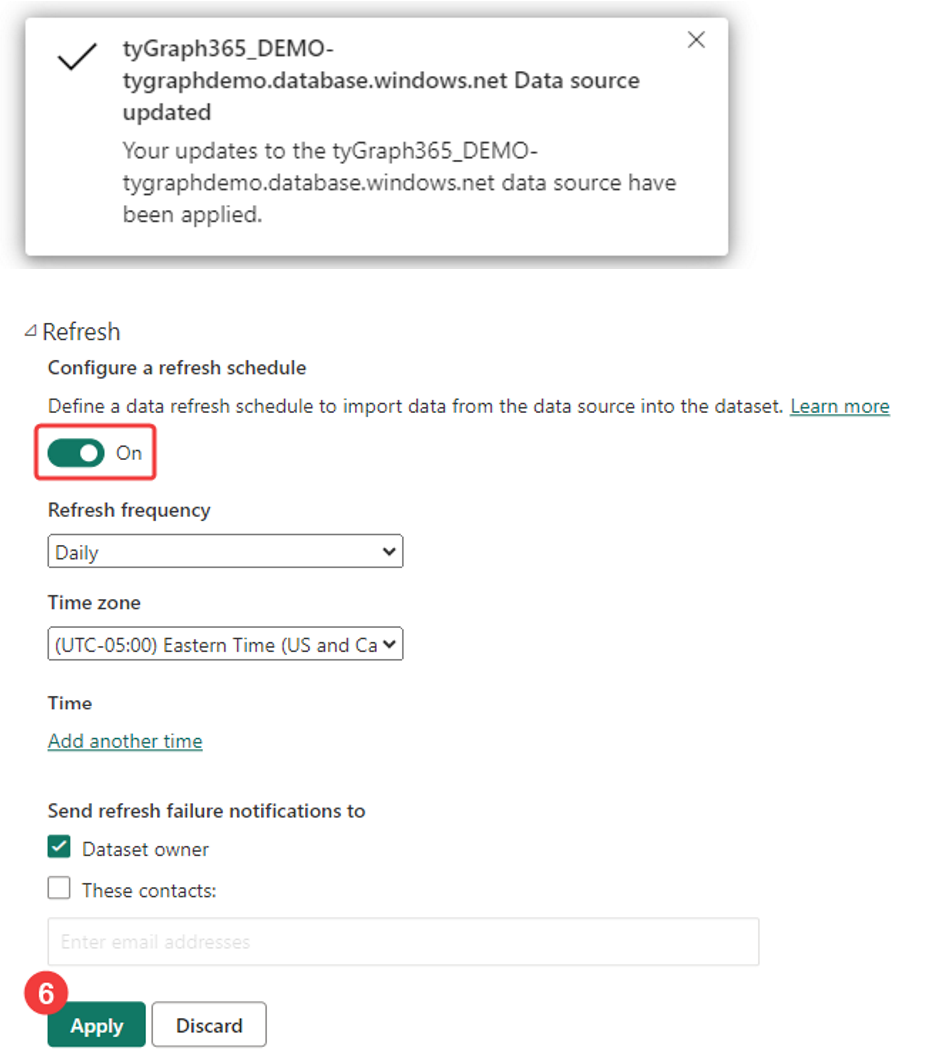
Open the Scheduled refresh section, turn on Keep your data up to date, and click Apply.
-
Return to the workspace overview.
-
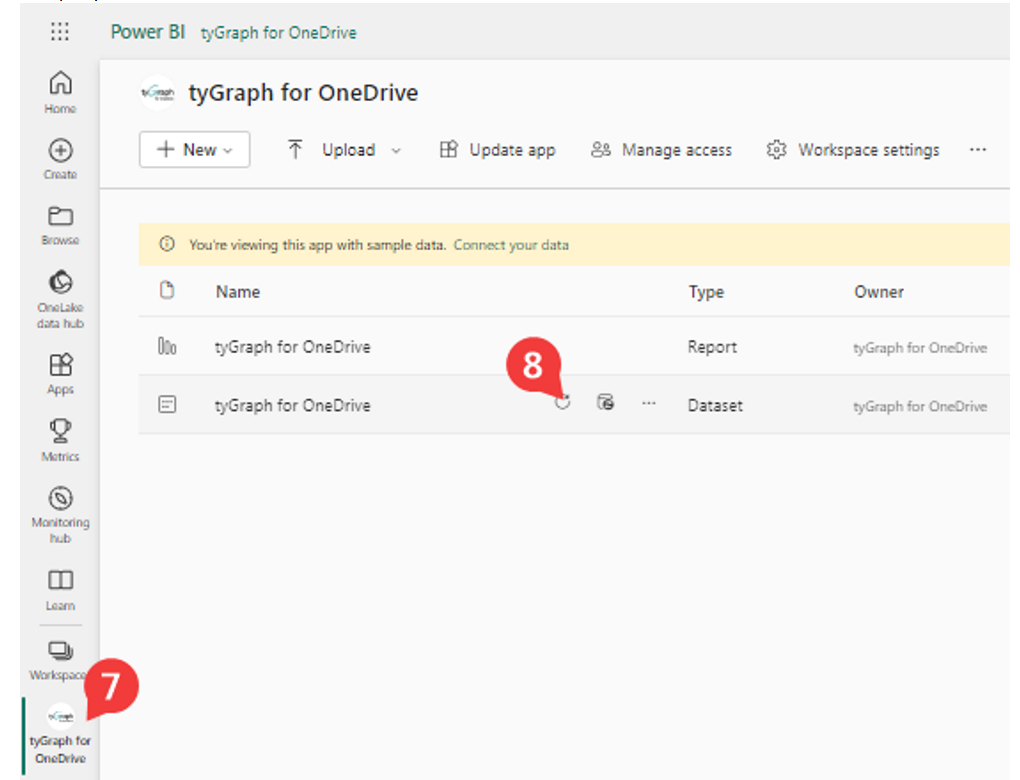
Hover over the new dataset and click the Refresh now icon. This updates the data immediately so you do not need to wait for the next scheduled refresh. Depending on the size of your organization, the refresh may take approximately 5 to 25 minutes.