
Connect an Application for ServiceNow ITSM (Private Preview)
The ServiceNow service is currently in private preview. If you want to try this service, contact your AvePoint representative for assistance.
To connect an application for ServiceNow, complete the following configurations.
Step 1: Create an Inbound Connected App
Follow the steps below to create an inbound connected app:
-
Sign in to ServiceNow.
-
Click All tag, search for Application Registry and then click it.
-
Click to switch to the New Inbound Integration Experience.
NOTEIf the New Inbound Integration Experience does not appear, refer to Create an Inbound Connected App without New Inbound Integration Experience for the subsequent steps to create an inbound connected app.
If the New Inbound Integration Experience appears, click and continue with the steps below. -
Click New integration to create a new app.
-
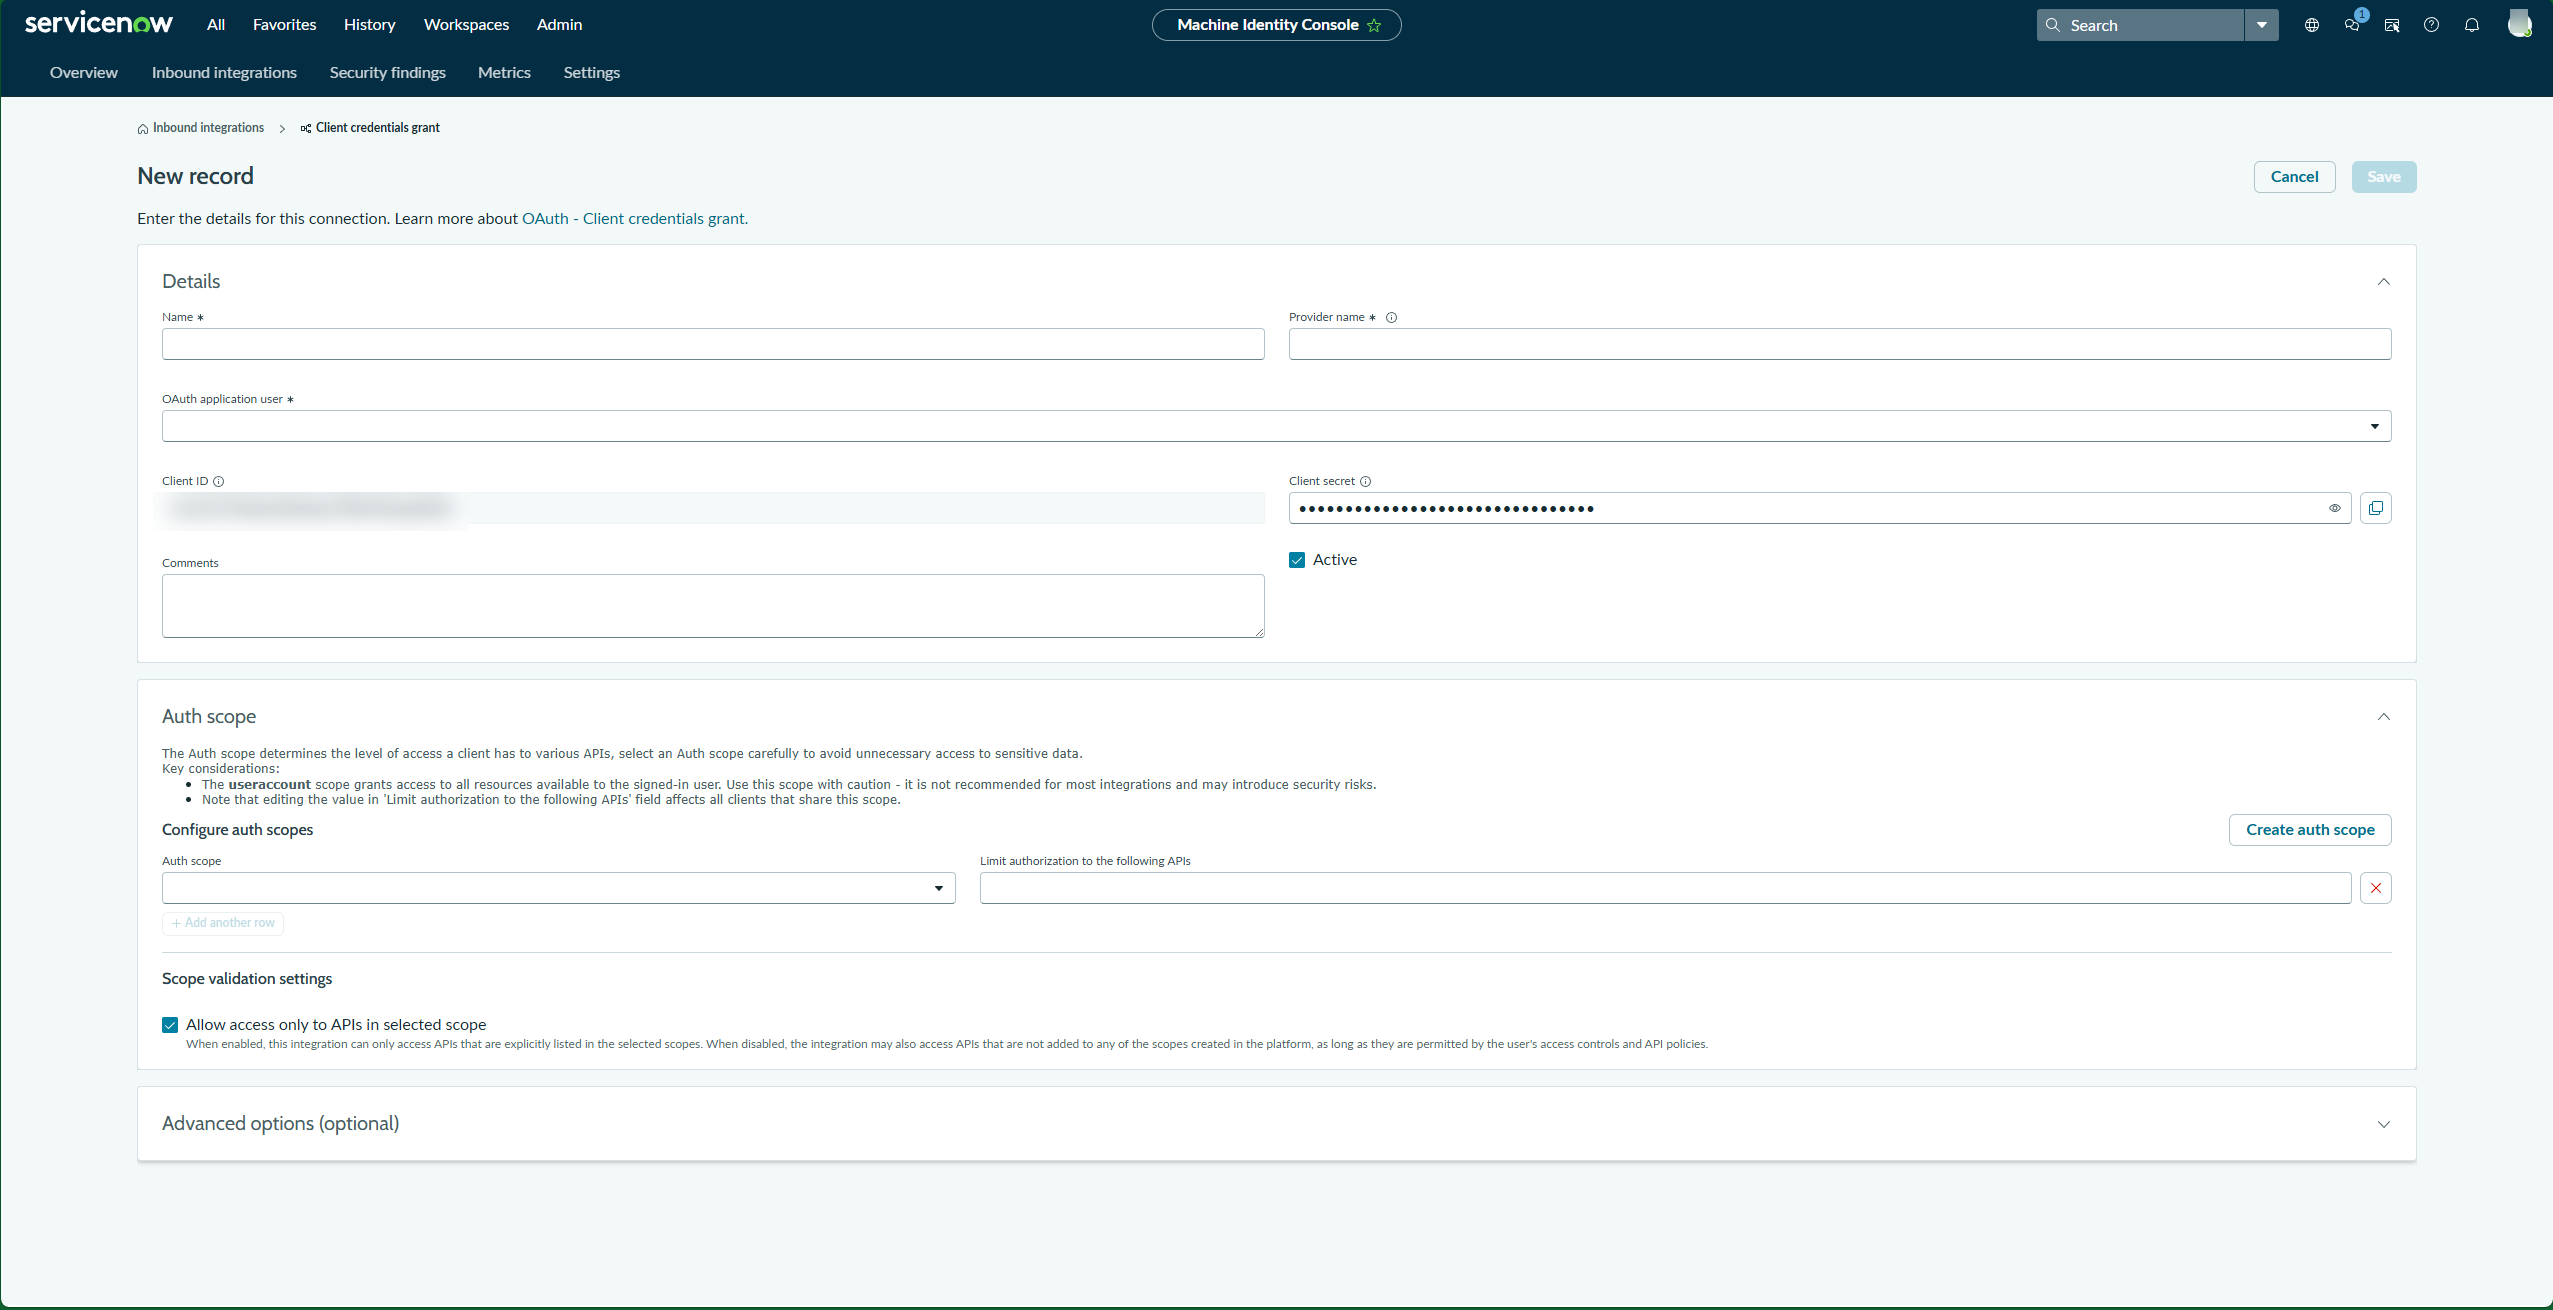
Select OAuth - Client credentials grant as the connection type, and then the New Record page will display automatically.
-
In the New record page, configure the following details in Details section:
-
Name – Enter a unique name for the integration.
-
Provider name – Enter the name of service provider.
-
OAuth application user – Select the user used for authentication from the dropdown list.
NOTEYou can copy and save the Client ID and Client secret of the app. It will be used in later steps.
By default, client credential is not enabled. If it remains disabled, the application registry will not take effect and the application connection to AvePoint Online Services will fail. To enable client credential, create the glide.oauth.inbound.client.credential.grant_type.enabled system property. Refer to Create System Property for details. -
-
In the Auth scope section, configure auth scopes.
-
In the Advanced options section, configure Access token lifespan.
-
Click Save.
Create an Inbound Connected App without New Inbound Integration Experience
Follow the steps below to create an inbound connected app if the New Inbound Integration Experience prompt does not appear:
-
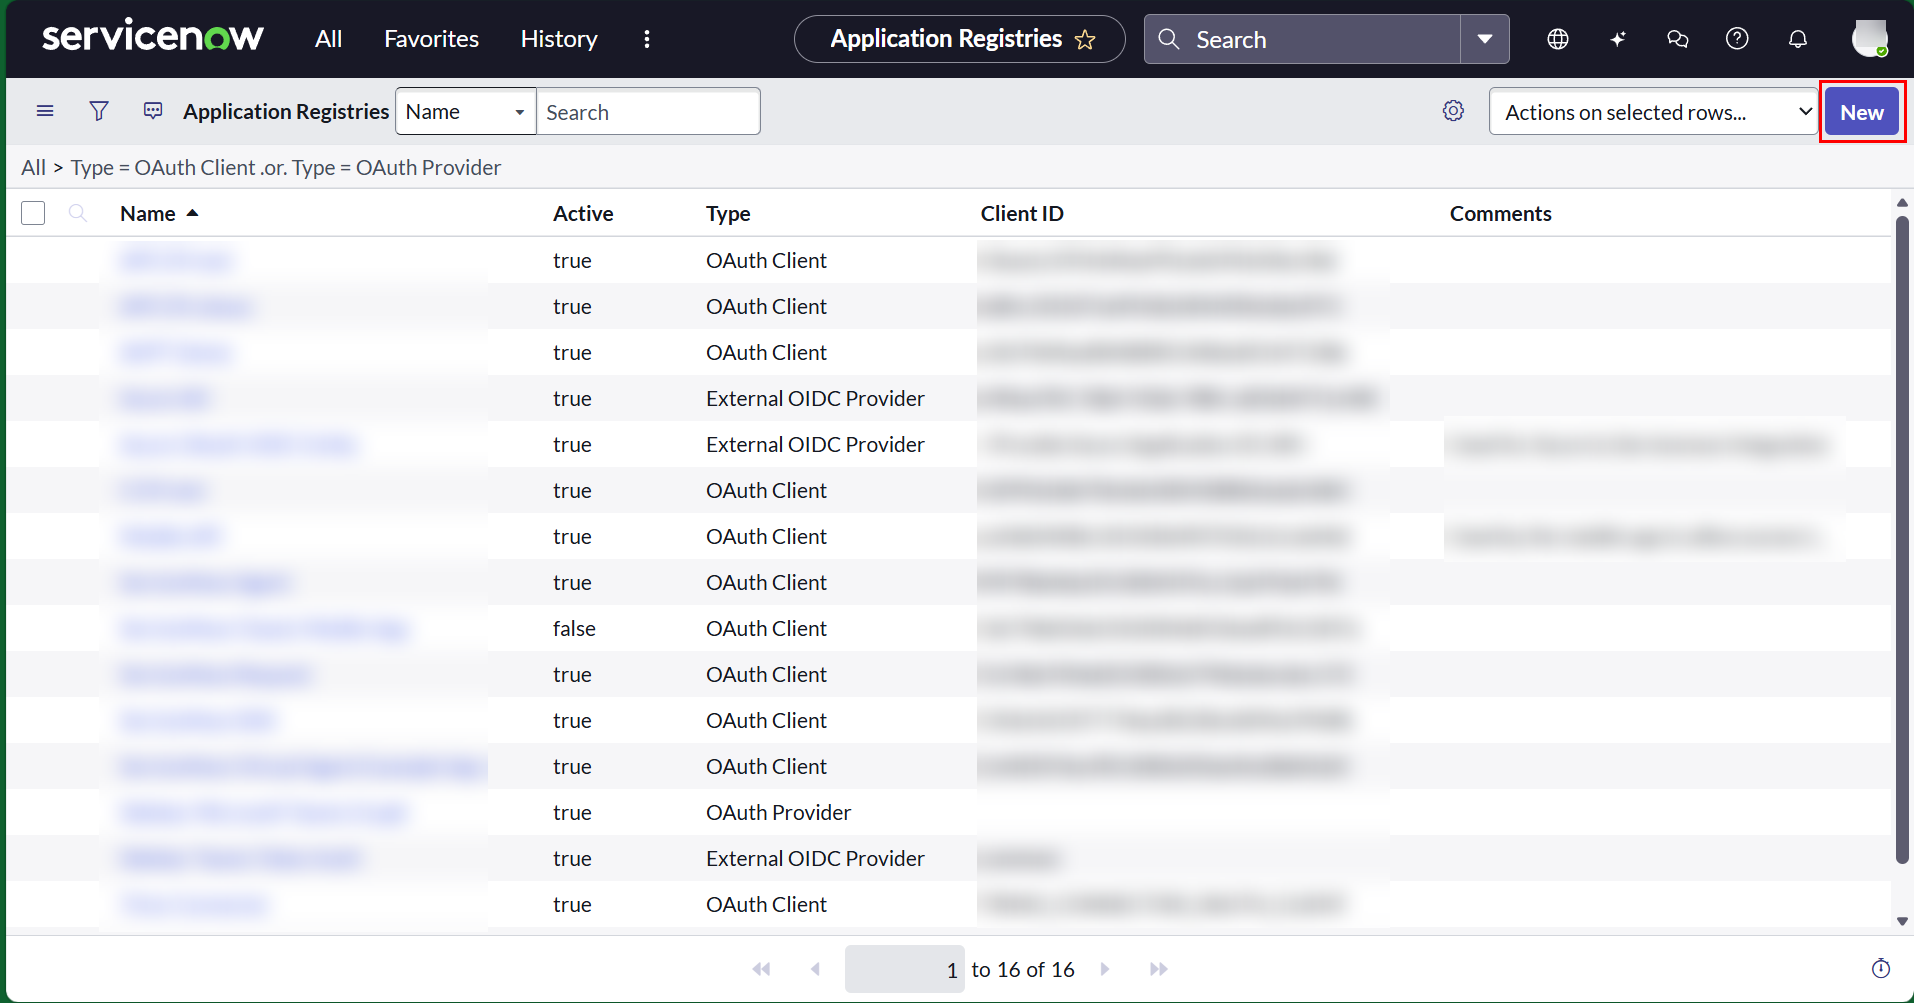
Click New to create a new app.
-
Click Create an OAuth API endpoint for external clients.
-
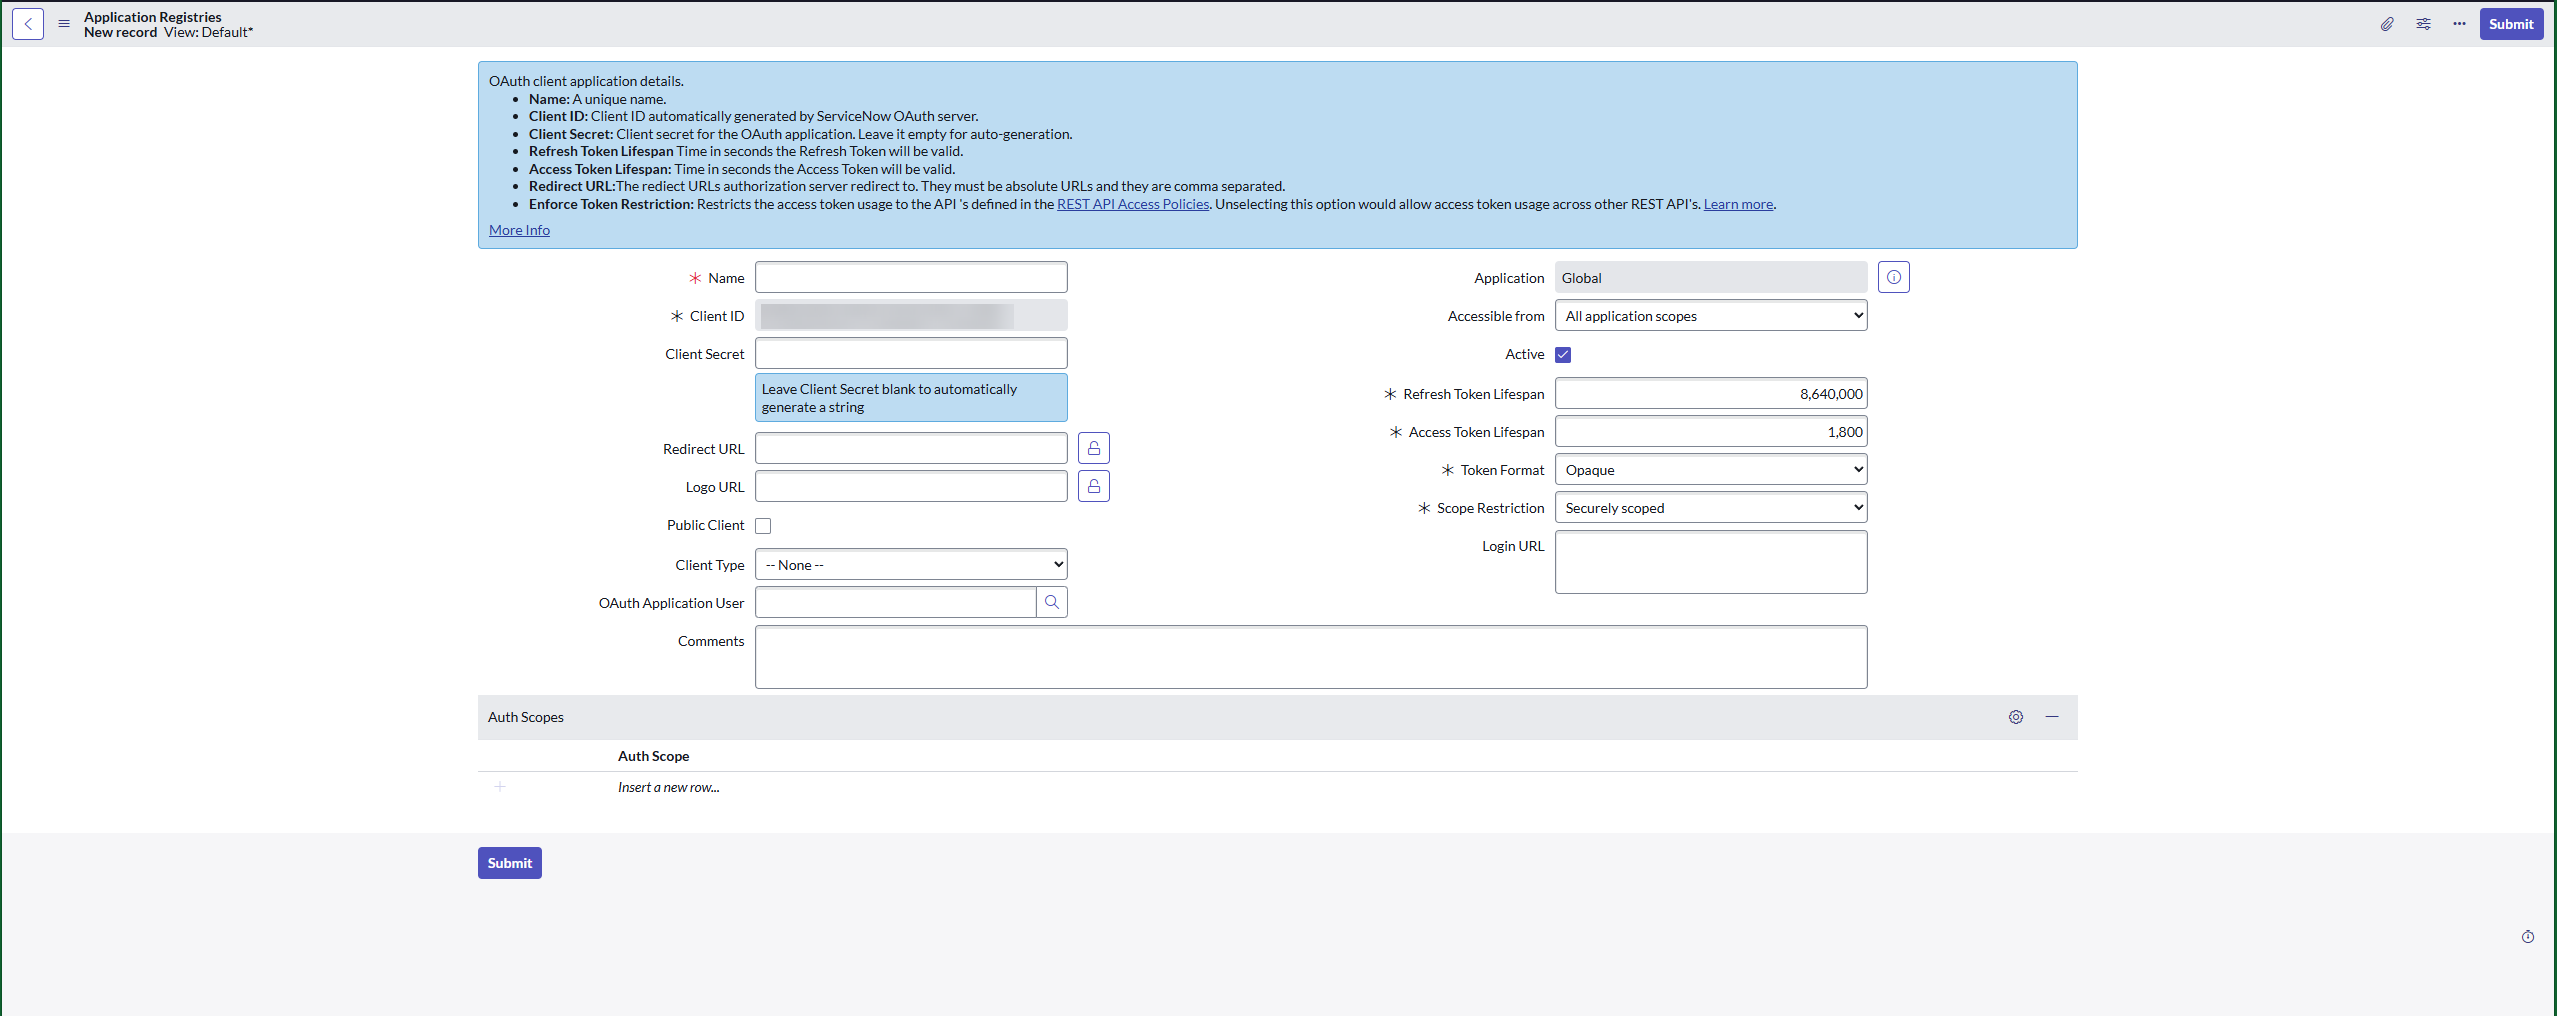
Configure the application registry.
 NOTE
NOTEBy default, client credential is not enabled. If it remains disabled, the application registry will not take effect and the application connection to AvePoint Online Services will fail. To enable client credential, create the glide.oauth.inbound.client.credential.grant_type.enabled system property. Refer to Create System Property for details.
-
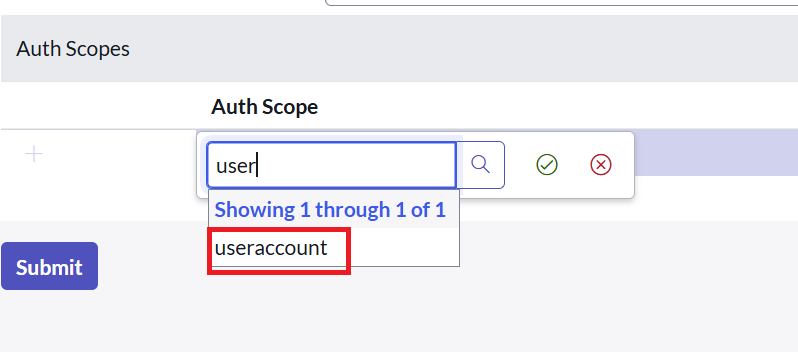
In the Auth Scope section, double-click Insert a new row..., enter the auth scope and then click the check mark icon. It is recommended to set the auth scope to useraccount.
-
Click Submit.
-
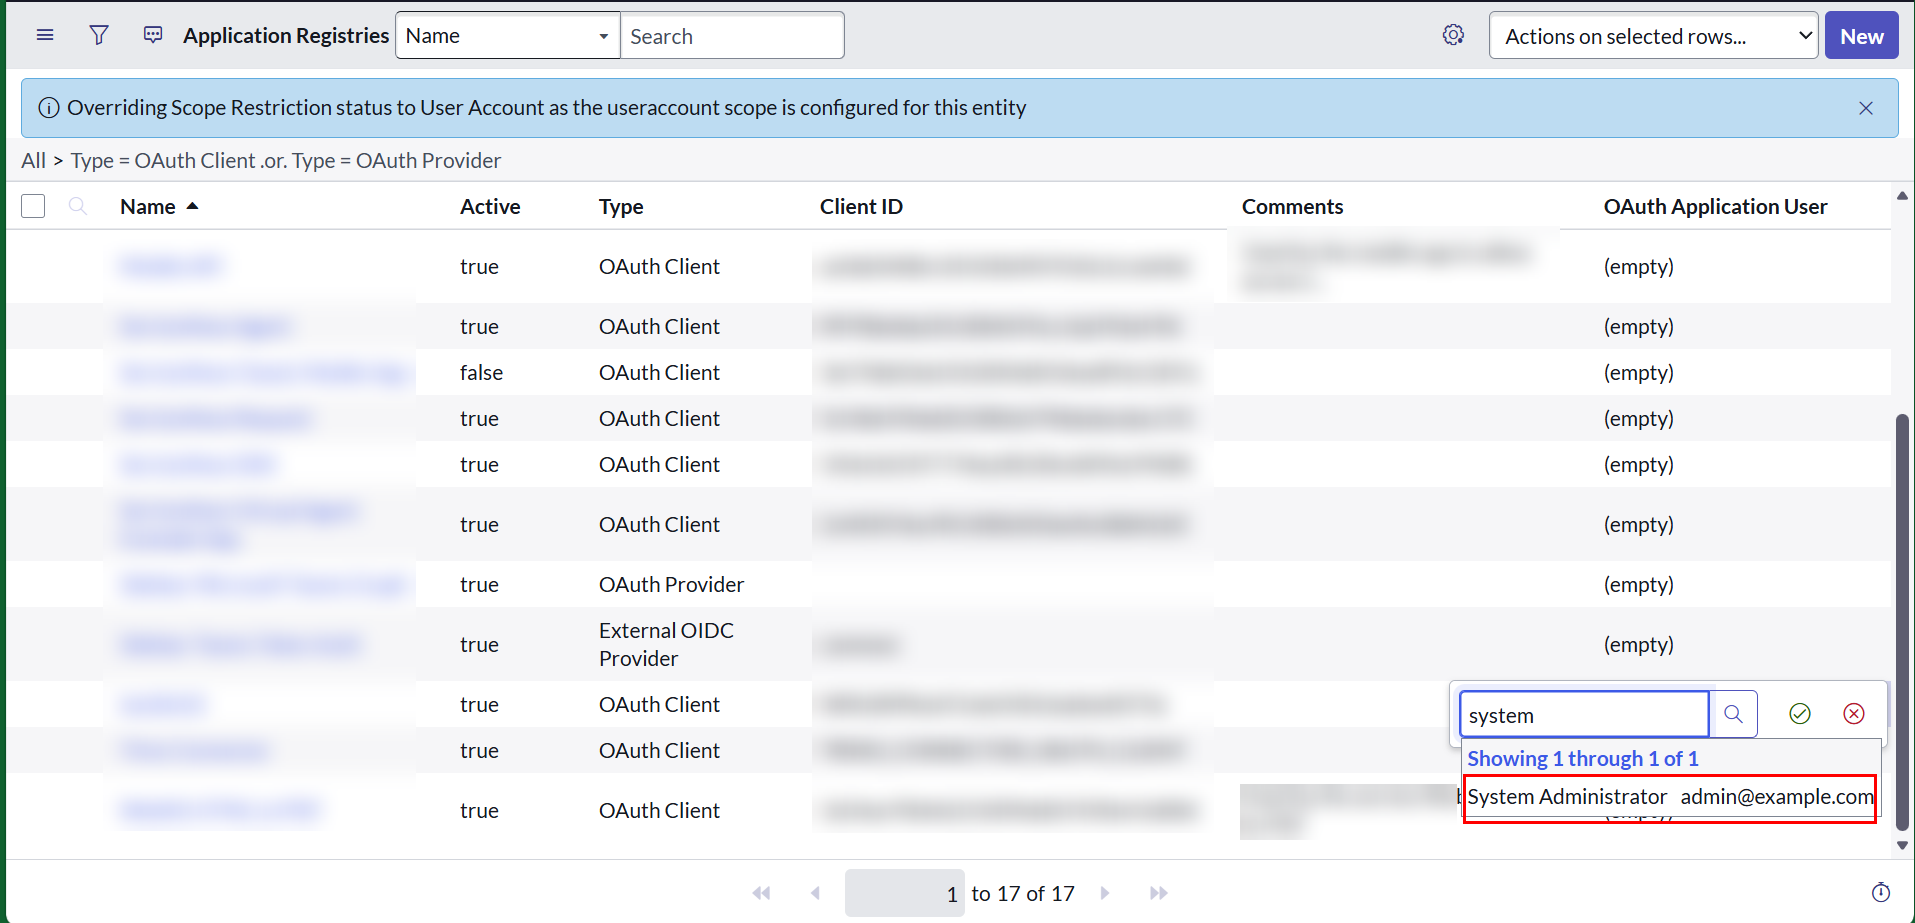
In the Application Registries page, double-click in the OAuth Application User field of the application registry record you just created, enter a user with sufficient permissions and then click the check mark icon.
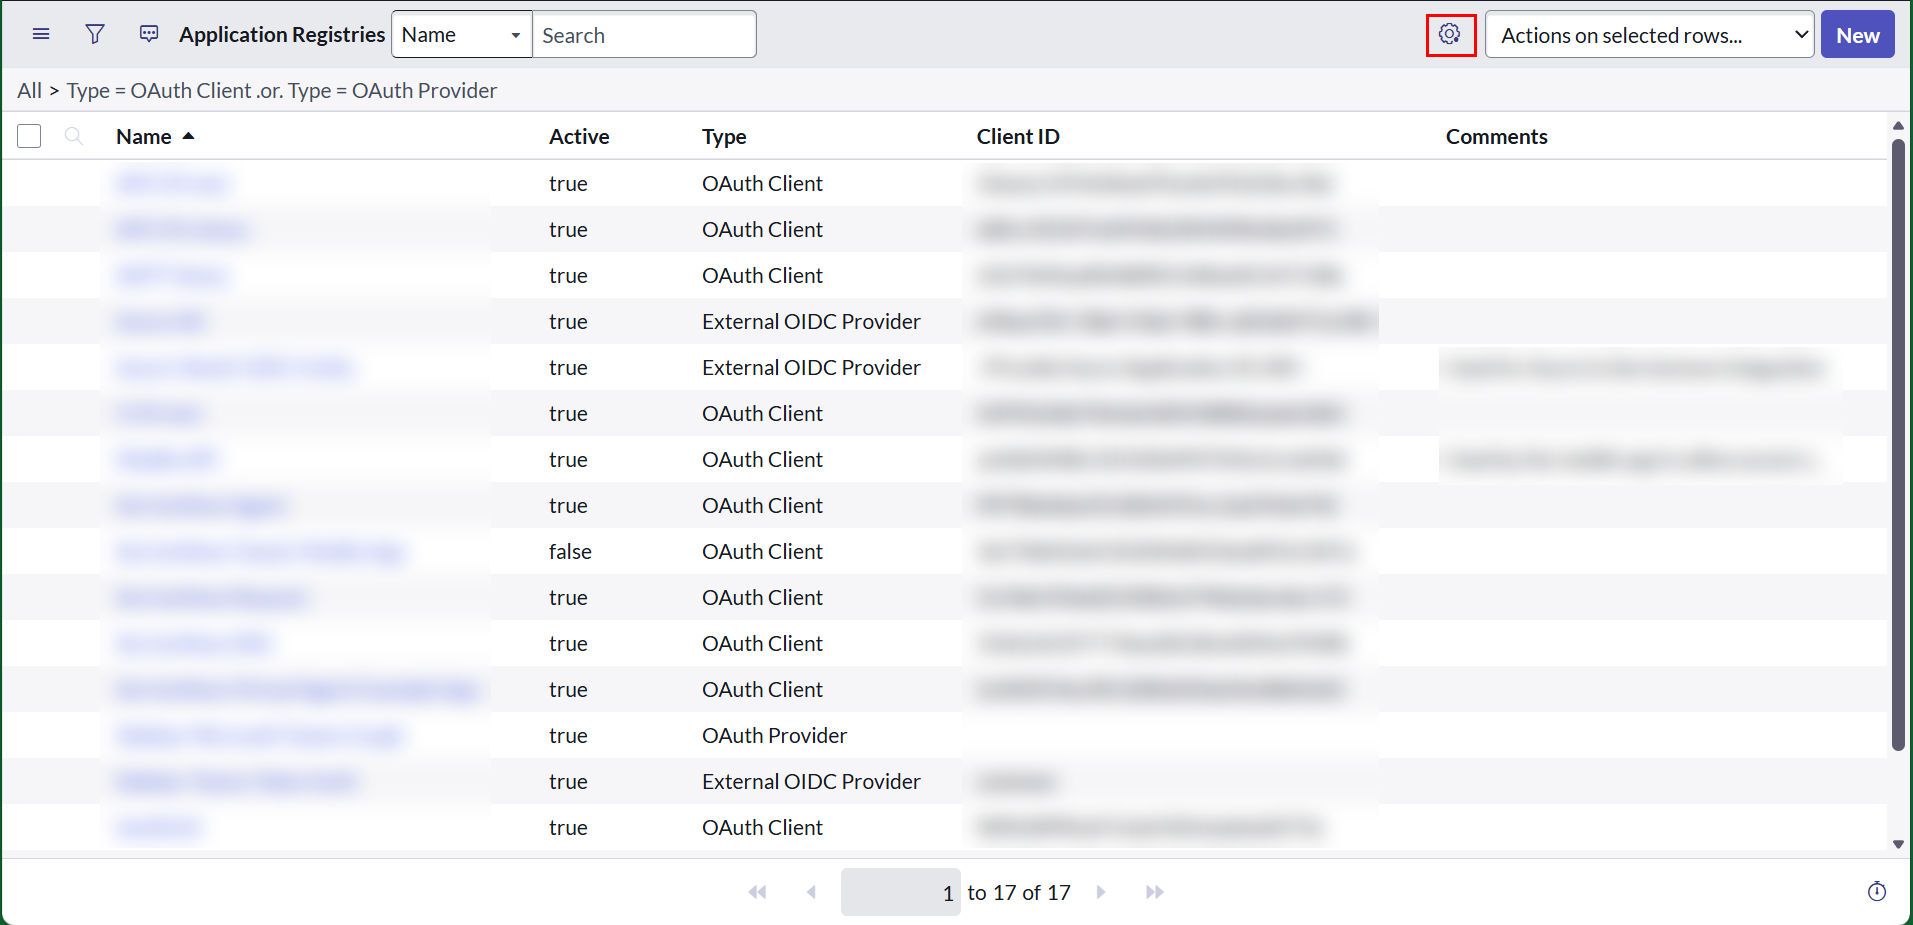
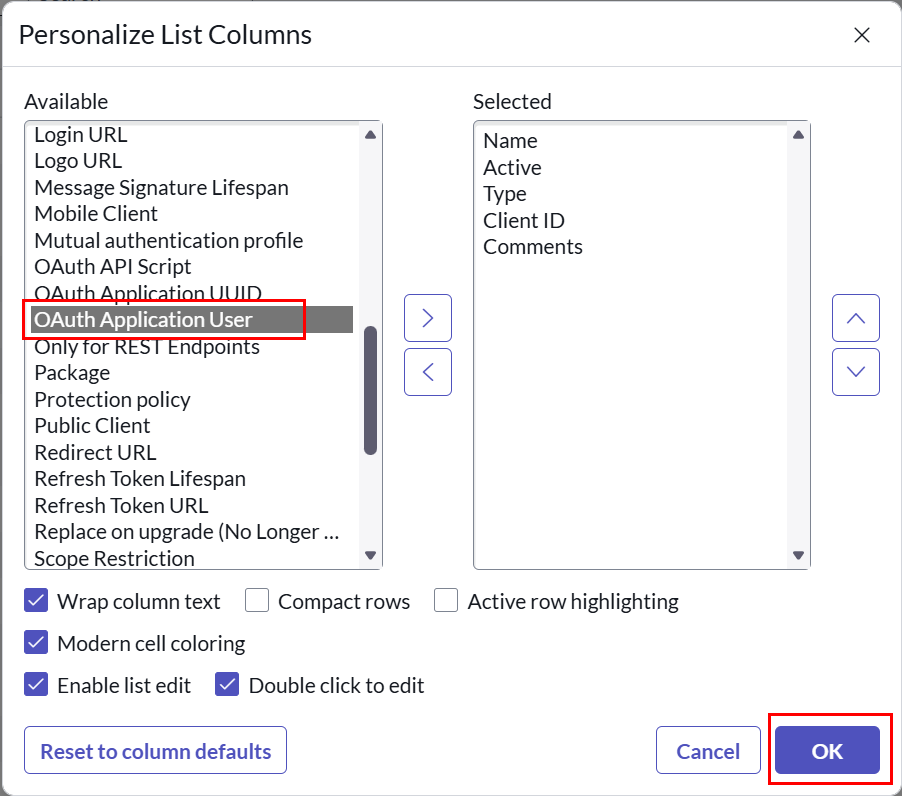
If the OAuth Application User column is not displayed, click Update Personalized List button, double-click OAuth Application User in Available section and then click OK. Then, you can configure the OAuth Application User.
Create System Property
Refer to the following steps to create the glide.oauth.inbound.client.credential.grant_type.enabled system property:
-
Click All tag in the home page, search for sys_properties.list and then press Enter on the keyboard.
-
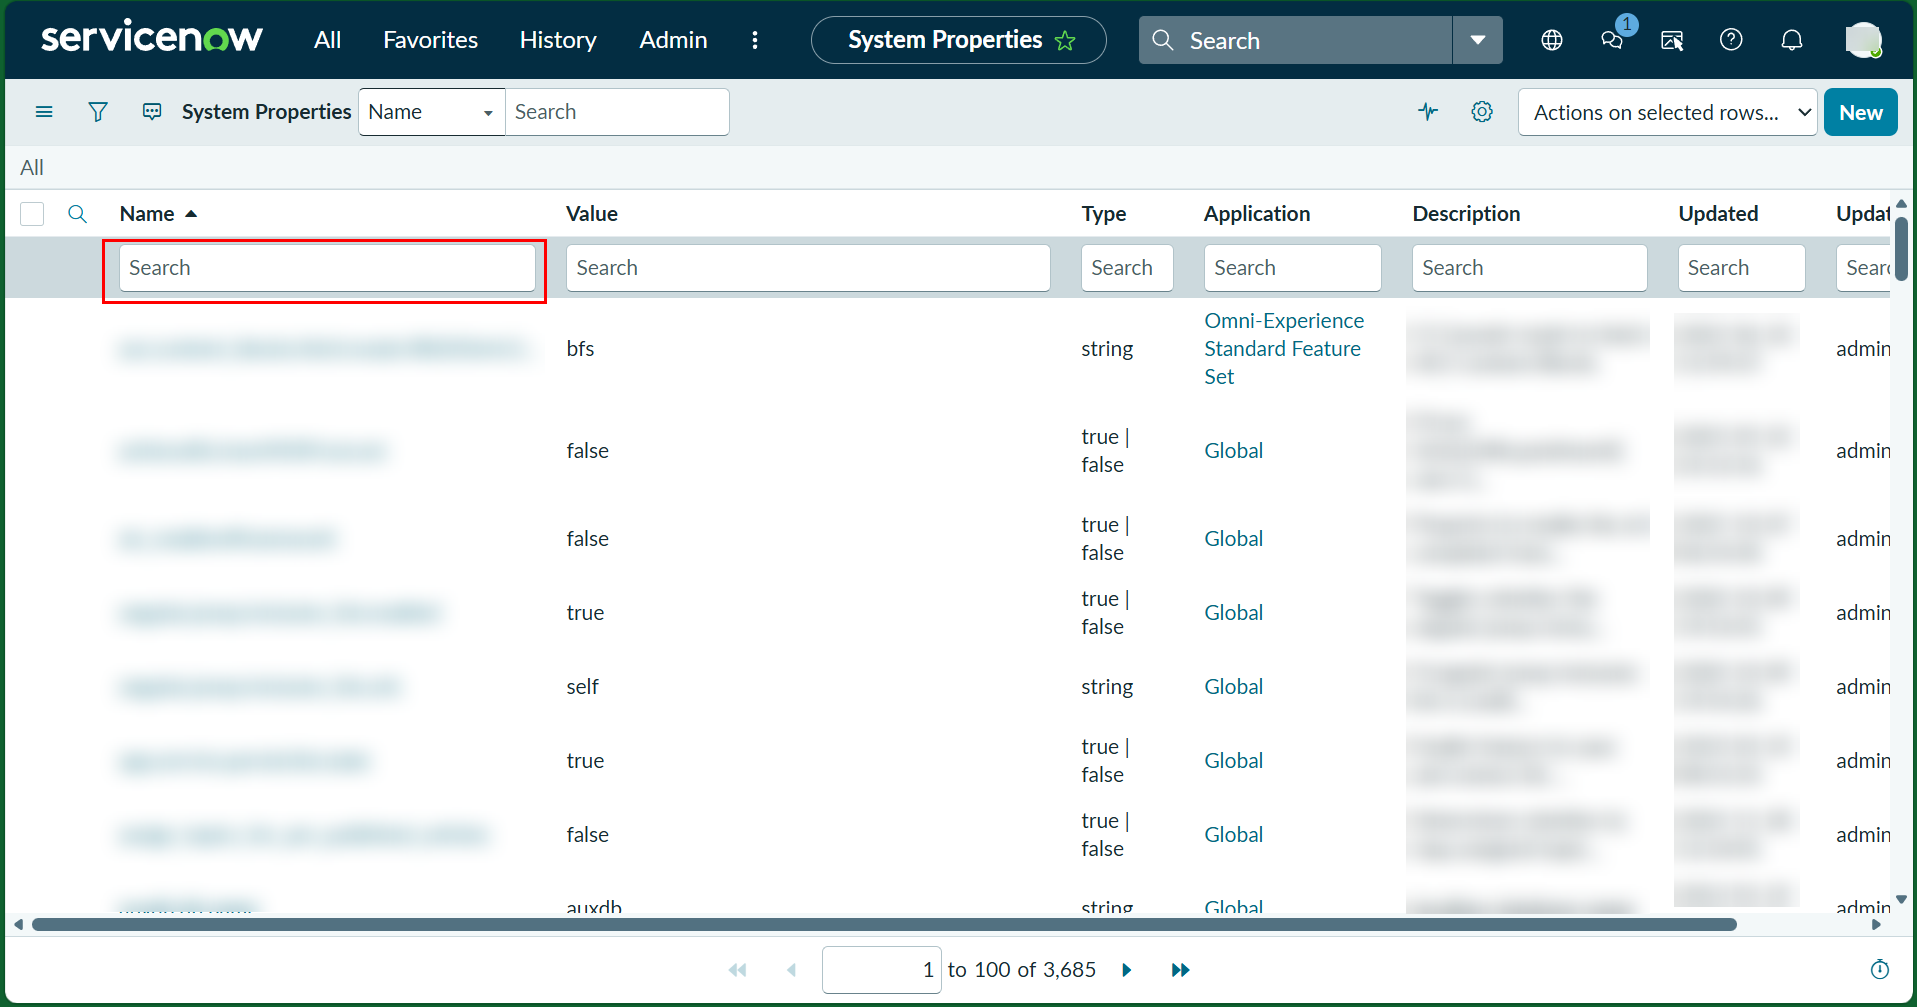
In the System Properties page, search for glide.oauth.inbound.client.credential.grant_type.enabled in the search bar of Name.
-
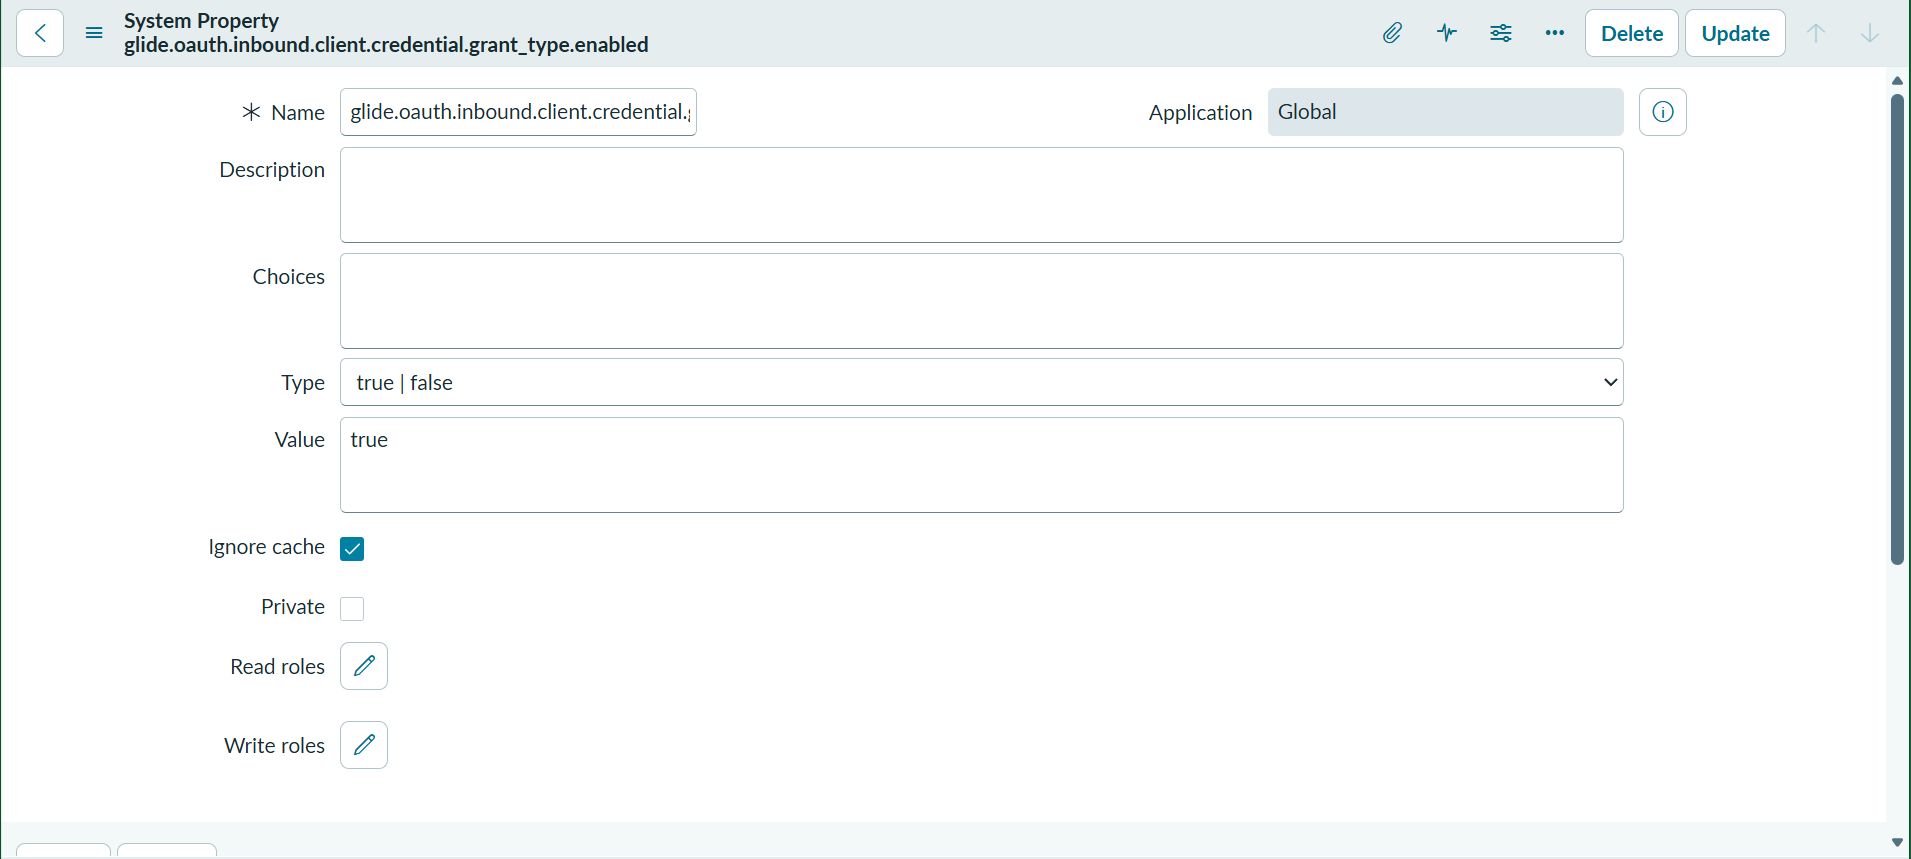
If there is a system property named glide.oauth.inbound.client.credential.grant_type.enabled, ensure the Value of it is true. If the Value is not set to true, refer to the following steps to update it:
-
Click the name of the property.
-
Update the value to true in the Value section.
-
Click Update.
-
-
If there is no system property named glide.oauth.inbound.client.credential.grant_type.enabled, refer to the following steps to create a system property:
-
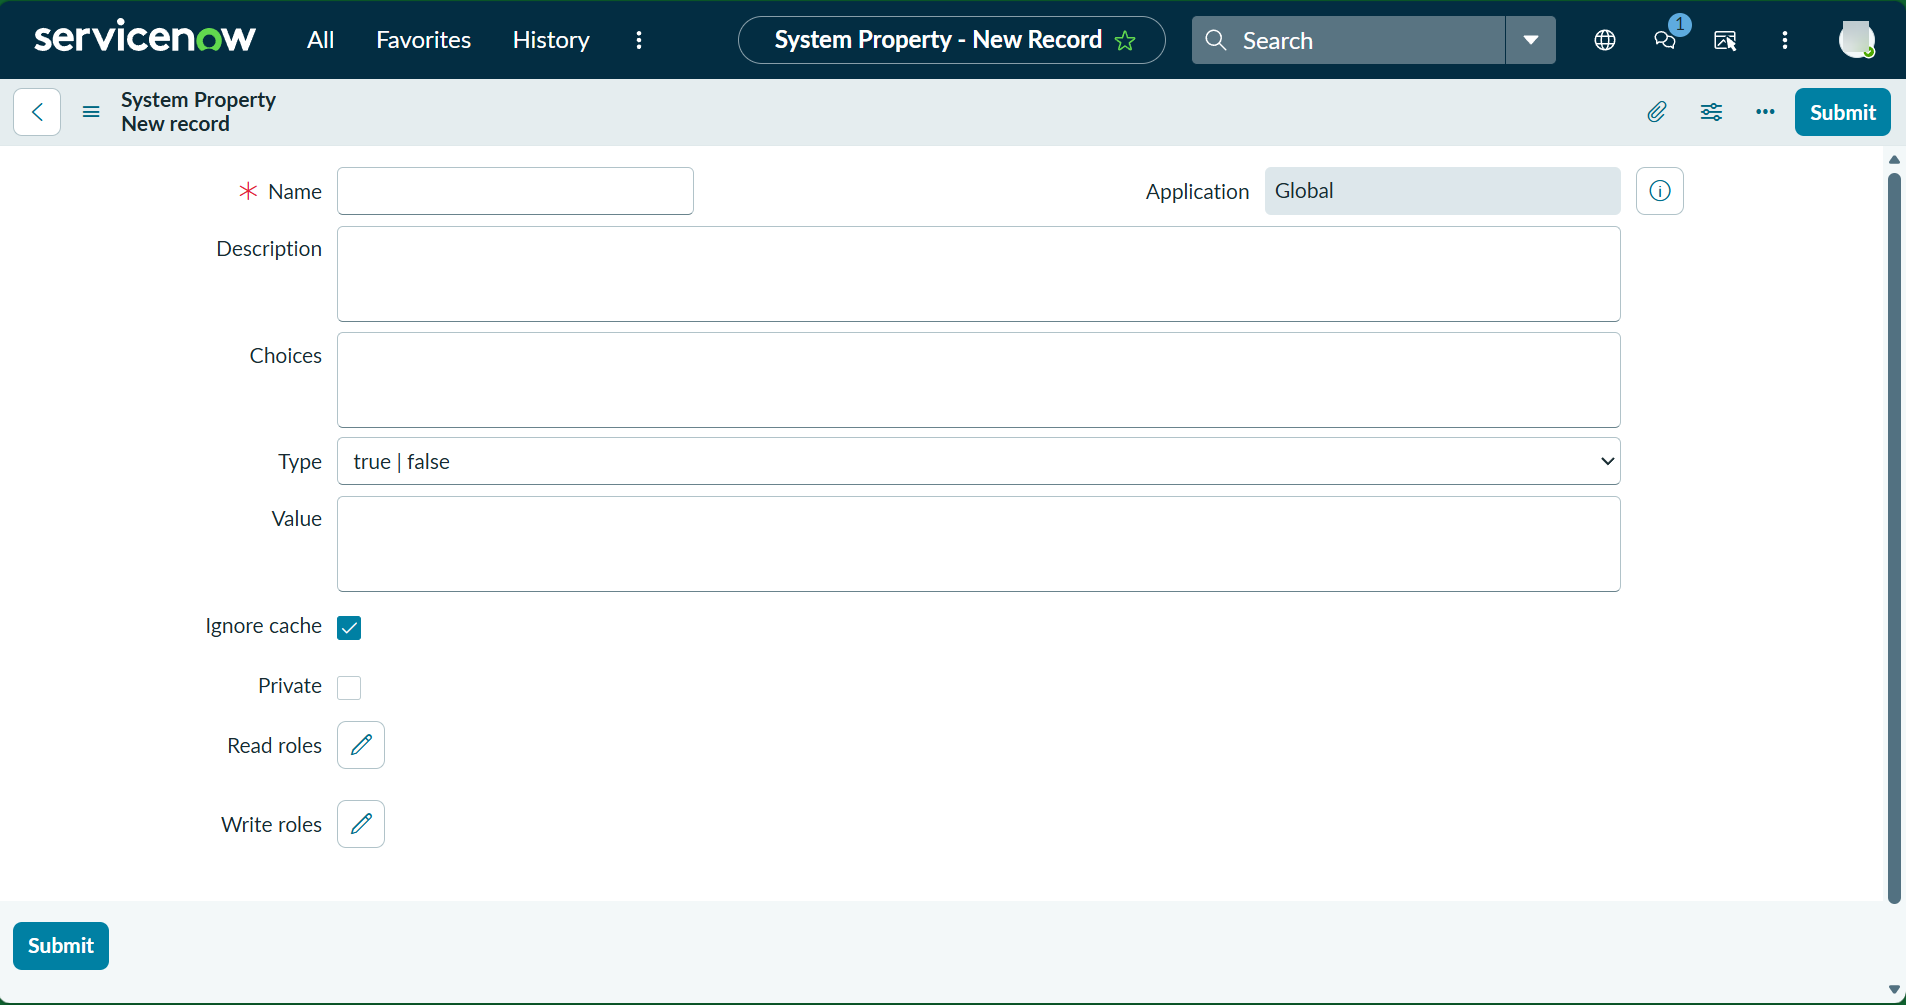
Click New to access System Property New record page.
-
Enter glide.oauth.inbound.client.credential.grant_type.enabled in Name section.
-
Enter a brief, descriptive phrase describing the function of the property in Description section.
-
Select true | false in Type section.
-
Enter true in Value section.
-
Click Submit.
-
Step 2: Create a Dedicated API User (Service Account)
Follow the steps below to create a dedicated API user:
-
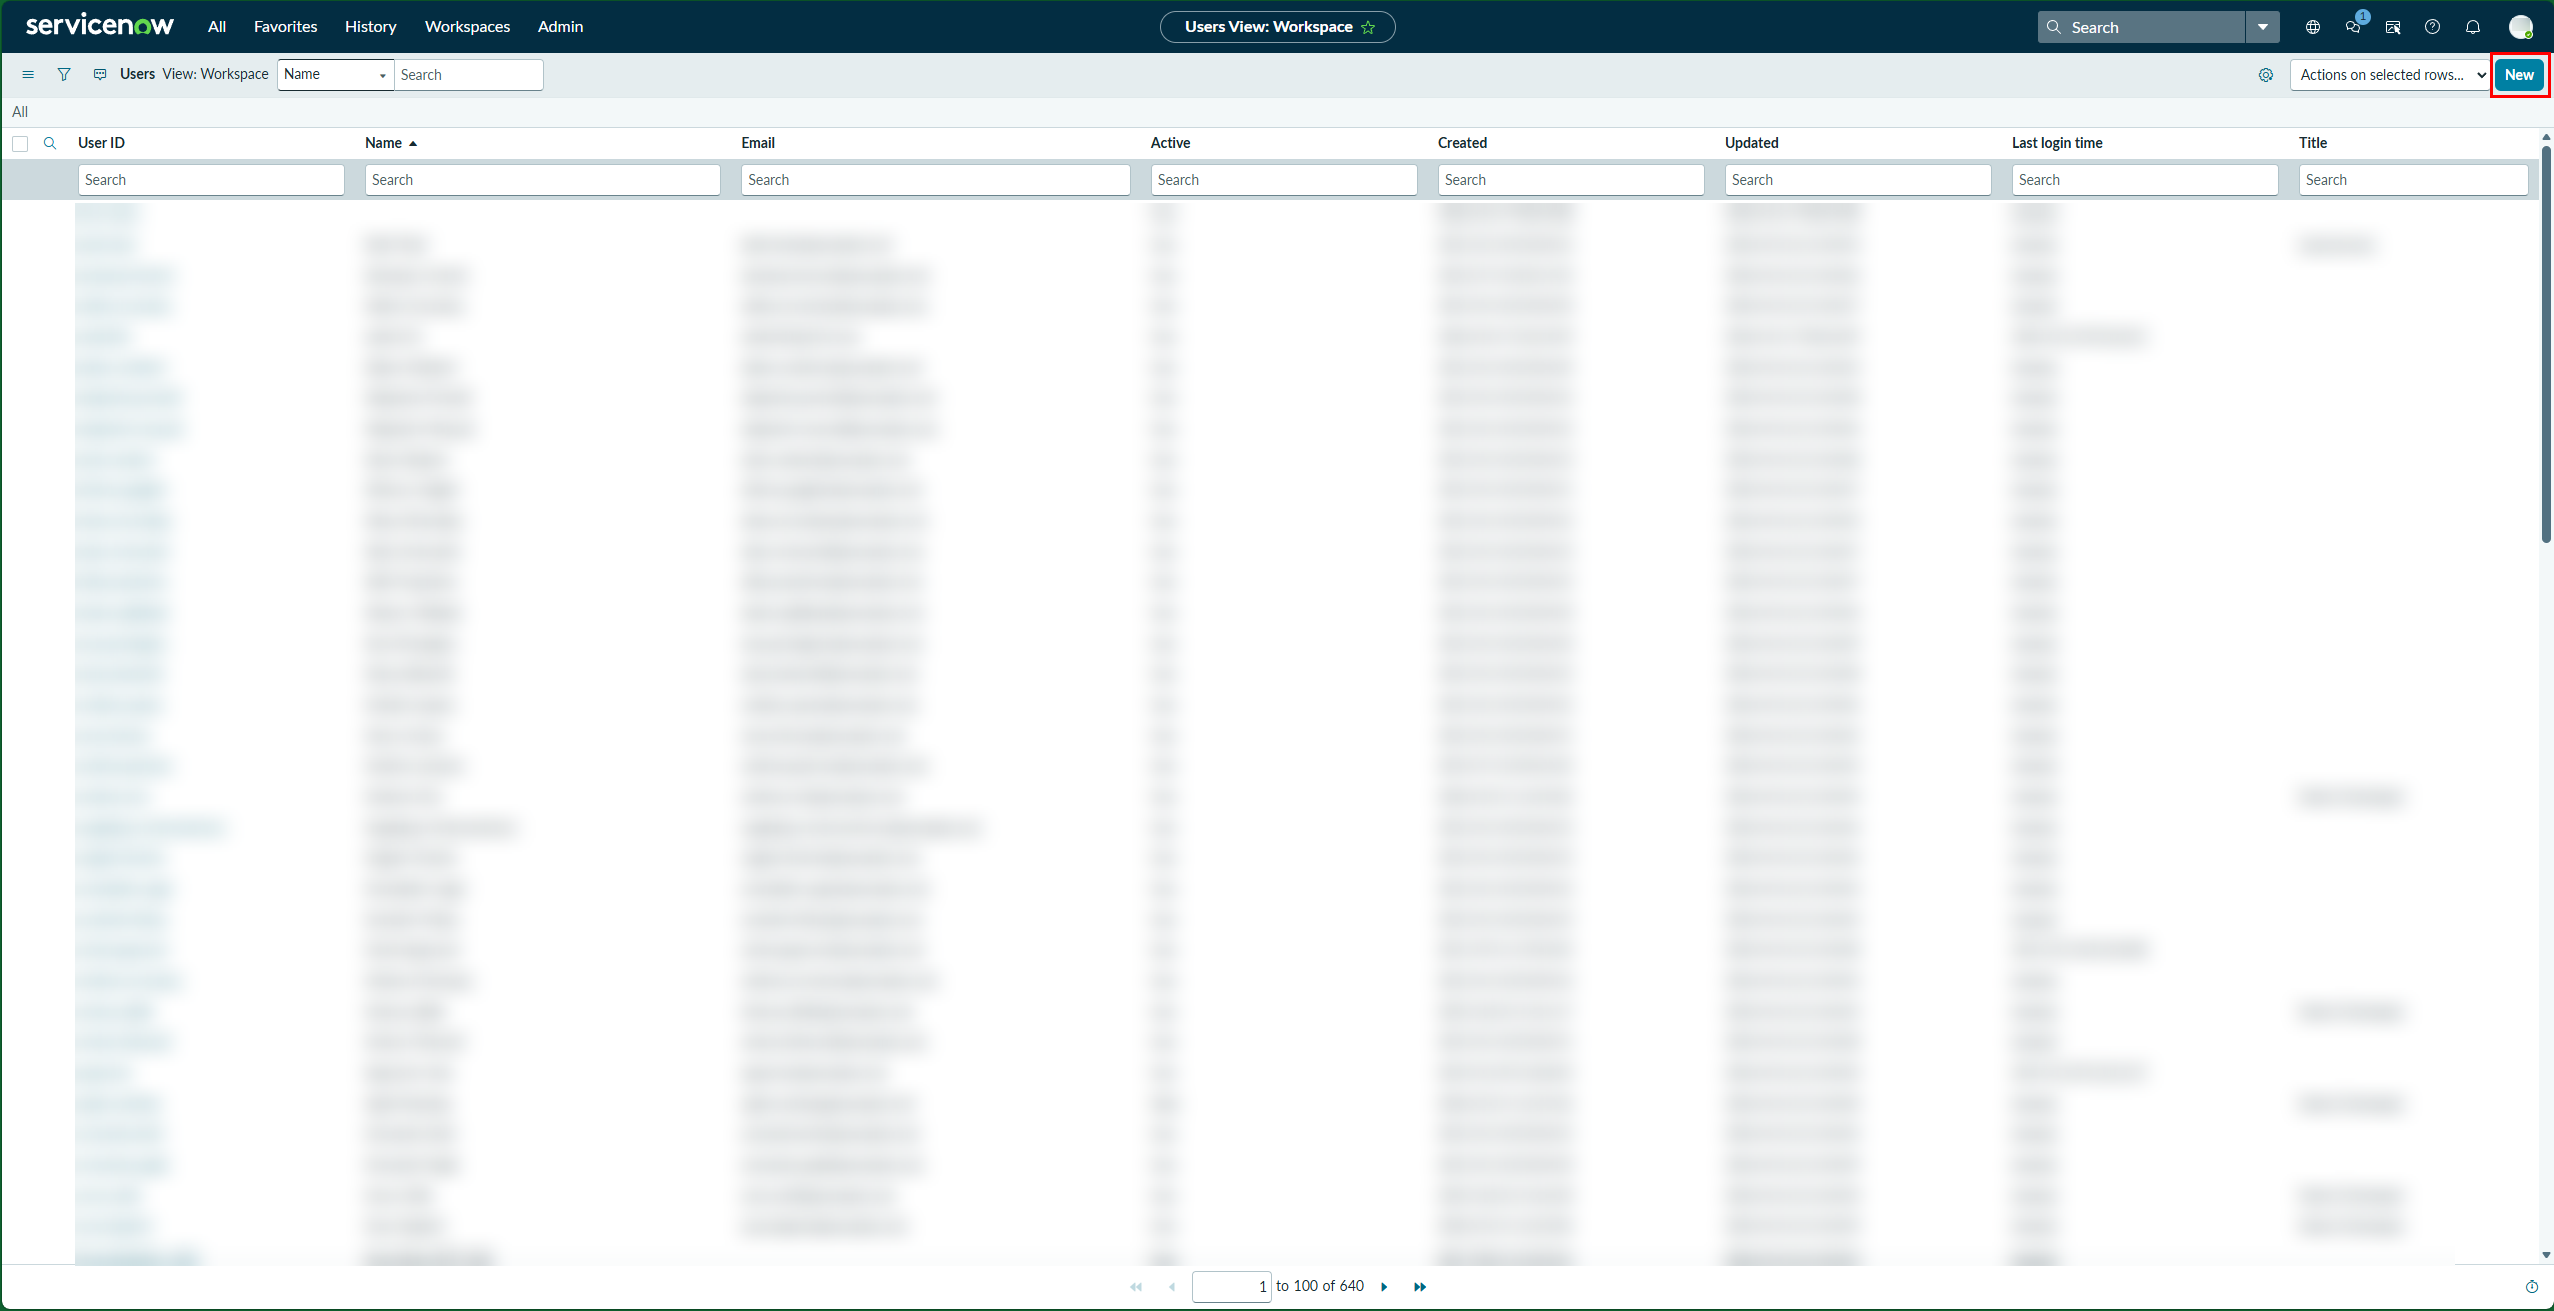
Click All tag in ServiceNow, navigate to Organization > Users.
-
Click New in the upper-right corner.
-
Enter the User ID, First name and Last name, and select the checkbox of Active.
-
Click Submit in the upper-right corner.
-
After creating the user, click the user ID of the required user in Users page.
-
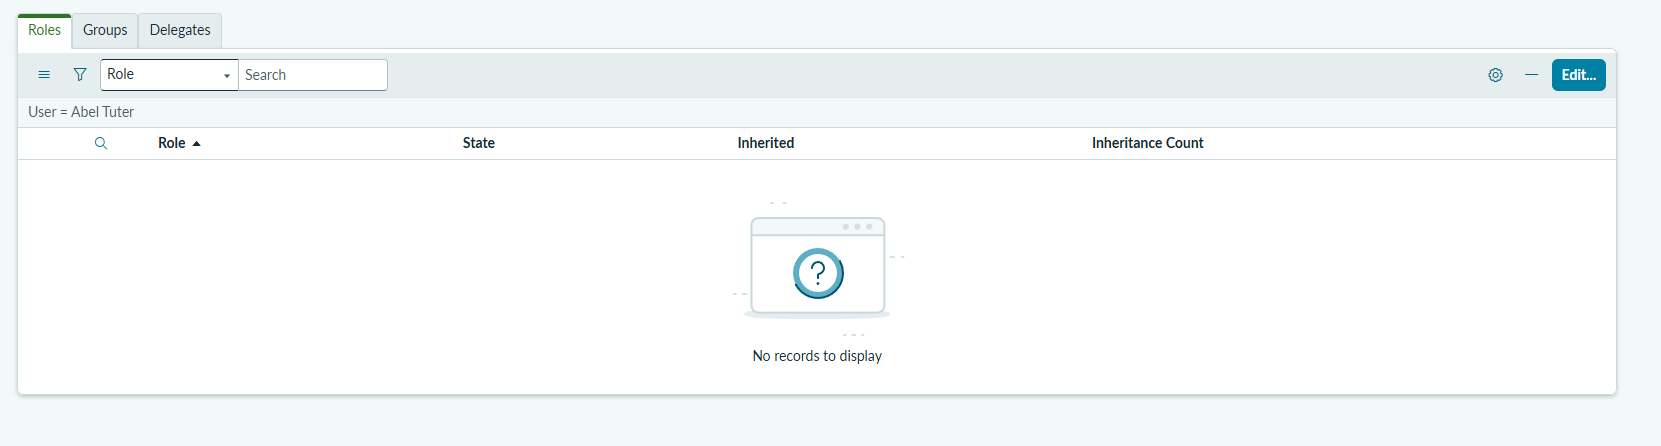
In the Roles section, click Edit to assign required roles.
-
Add rest_service, soap_query and rest_api_explorer to the Roles list. You can search with keywords in the search bar.
-
Click Save.
Step 3: Create an application connection in AvePoint Online Services
Follow the steps below to create an application connection in AvePoint Online Services:
-
In AvePoint Online Services, navigate to Management > App management > Application connection, and then click Create on the action bar.
-
In the Create application connection panel, complete the following settings:
-
Profile name – Enter a name for your connection profile.
-
Description – Enter a description for the connection for future reference. This field is optional.
-
Select application – Select ServiceNow from the drop-down list.
-
Instance connection – Enter the URL copied from ServiceNow. For example, https://dev123.service-now.com.
-
Client ID – Enter the client ID copied from ServiceNow.
-
Client secret - Enter the client secret copied from ServiceNow.
-
-
Click Save.
Once you have created the connection profile, it will appear on the Management > App management > Application connection tab. Your application will now be connected. If needed, you can select a connection profile to Edit or Delete it.